

 DVD Burner
Best Software to Make Worship Service DVDs


I struggled with creating satisfying DVDs for our shut-in ministry until I started using Cisdem DVD Burner. Now, I can burn worship services onto discs with menus & chapters, which helps our homebound members easily navigate them. - Glenn | Church Media Director
Glenn is the media director for a small church. He handles the recording and streaming of Sunday services. Every week, he uses OBS to stream on Vimeo and takes care of the church's audio-visual equipment, including an old DVD recorder.
The challenge
As church continued to create weekly worship DVDs for homebound members, Glenn found that using an aging DVD recorder to burn the service directly wasn't useful. The finished DVDs were full of waiting scenes and extra stuff, making it hard to quickly jump to the sermon or the worship.
The clunky DVD burning not only wasted discs and time but also gave homebound members a poor viewing experience. Thus, Glenn wanted to get rid of this outdated method.
The solution
Glenn asked for help in a Facebook group and got a bunch of responses. Many suggested editing the recorded video and then burning it on a computer using DVD authoring software. Since the church has 2 old desktop computers with built-in optical drives, he thought this could be a good way to go.
Out of all the programs recommended, Glenn picked Cisdem DVD Burner because it’s user-friendly, supports basic editing features, and allows for chapter creation. After using it several times, Glenn was impressed with Cisdem DVD Burner and decided to post about his experience.
Steps Glenn took to create worship service DVDs
Before I began, I made sure I had everything ready:
Source file: I exported the Sunday morning service live stream from OBS as an MP4.
DVD authoring program: I downloaded Cisdem DVD Burner from its product page. It's also available on the Mac App Store and the Microsoft Store.
Blank DVD disc: Burning worship service DVDs is a routine task, so I have purchased hundreds of Verbatim DVD-5 discs.
Why did I choose DVD-5?
A complete Sunday worship service livestream is about 70 to 90 minutes. If unnecessary segments are edited out, it may be reduced to 60 to 80 minutes. The standard capacity of a DVD-5 is 120 minutes, which is sufficient to hold a typical worship service.
Step 1. Import videos to the app
I launched Cisdem DVD Burner and imported the MP4 file recorded from OBS into it. Not just MP4 - it supports most video formats.
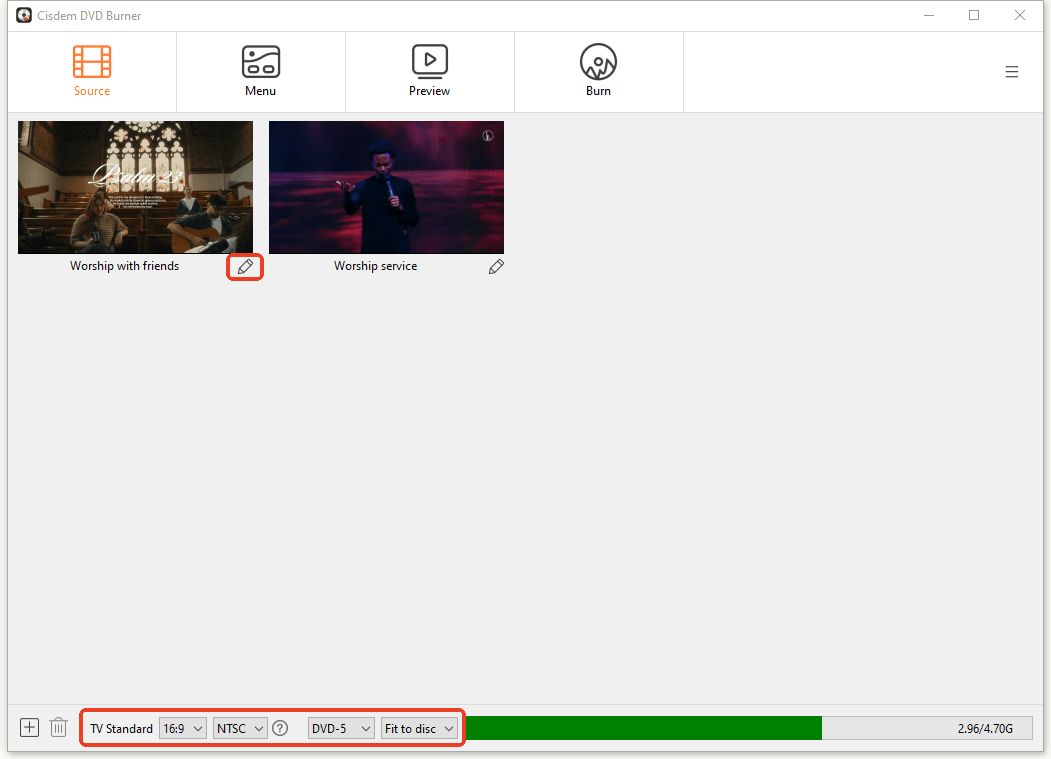
Step 2. Configure DVD parameters
At the bottom of the window, I selected "Fit to Disc" and kept the default NTSC TV standard.
Overall, “Fit to Disc” is the best option for burning a worship service to DVD-5 for quality and speed. Note: It also works great for burning a megachurch service livestream that lasts 90 minutes to 2 hours.

Step 3. Edit the video
Already edited your video and don't need to add chapters? You can skip this section. Otherwise, click the pencil icon to open the video editor.
Trim: I trimmed the redundant beginning and ending by dragging the slider.
Chapter: I divided praise & worship, special music, sermon, and other parts into different chapters. It’s a key step in enhancing the experience, allowing members to jump to specific parts with just one click.
Volume: I felt the overall volume was too low, so I increased it appropriately. Note: Complex noise reduction or equalization needs to be done in OBS or pro editing program.
Cisdem DVD Burner also provides other editing tools such as cropping, adding subtitles, etc.

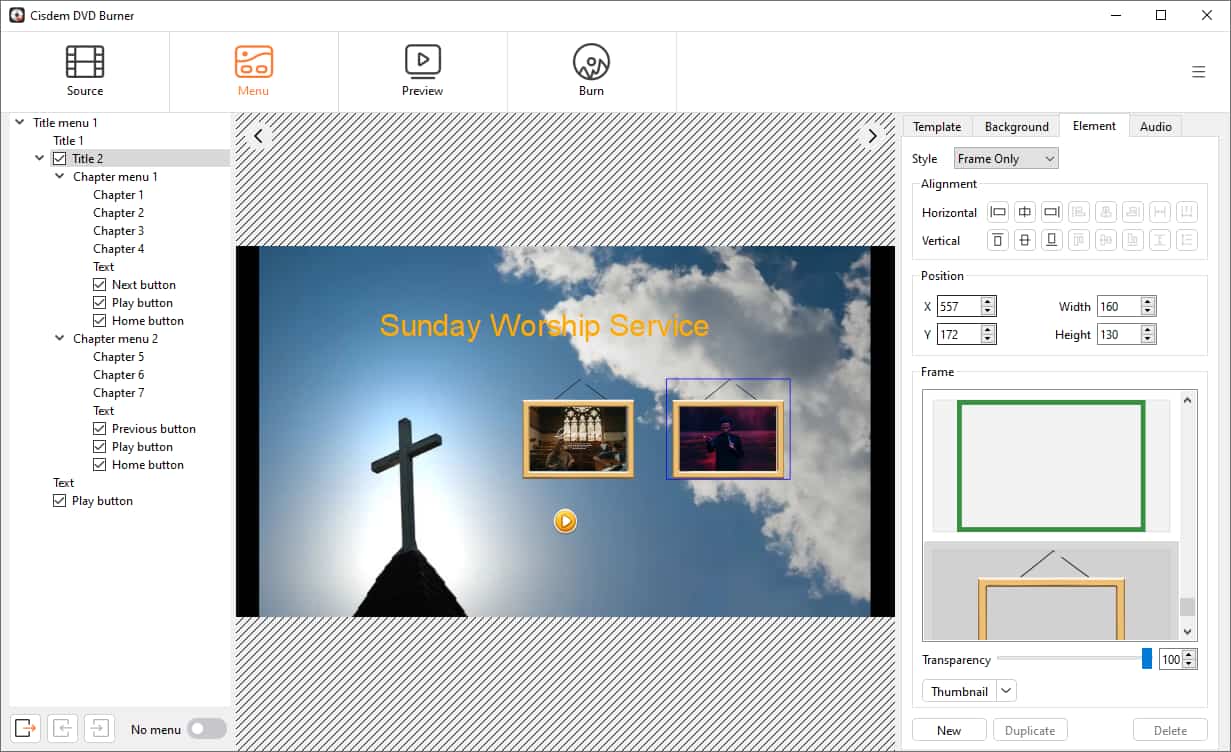
Step 4. Make DVD menu
Move over to the "Menu" interface. You can choose a template from Classic. For videos celebrating major Christian holidays, you can select Christmas or Easter themes from the Holiday templates. I created my own custom menu.
- I uploaded a close-up background image of a cross from my computer.
- I re-selected video frames & menu buttons and added chapter labels.
- I renamed the DVD title from “My DVD” to “Sunday Worship Service”.
- I adjusted the size and position of all elements, also modified the font and color for the text.
I communicated with the shut-in ministry and learned that most homebound members don't wish to add background music, so I did not include it.
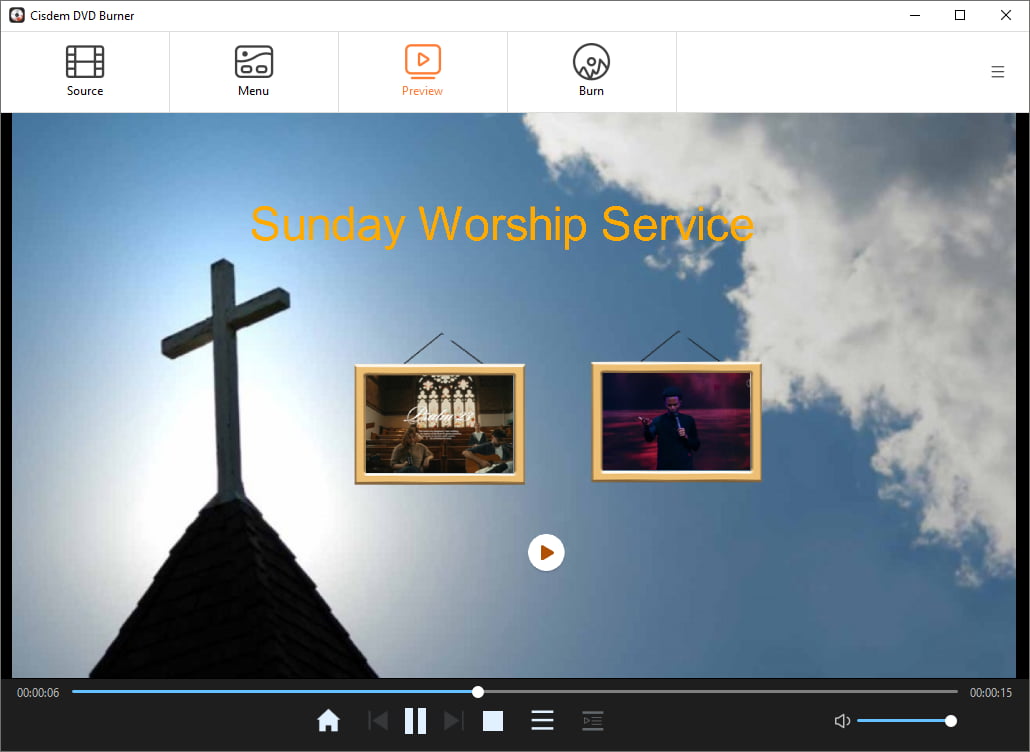
Step 5. Preview the DVD
Use the on-screen navigation controls to check:
- Whether the menu layout is correct.
- Whether the video has been successfully trimmed.
- Whether chapters can be skipped accurately.
Step 6. Start to burn
Go to the "Burn" interface, set the output, insert the disc and burn it.
My settings are: chose “Burn to Disc”, “Start from menu and play all titles sequentially” playback mode, 11 copies number (the number is flexible, with a variation of 1 to 3 people).

FAQ
Yes. Cisdem DVD Burner supports burning any video type and offers templates with various themes, including Wedding and A Celebration of Life. Even if no suitable template is available, you can customize and replace the background.
For longer videos, it‘s recommended to add chapters. It allows you to quickly skip to the sermon or prayer parts without having to fast-forward through the entire video - makes navigation smoother and more convenient.
If your video is under 77 minutes (ideally under 70 minutes to allow space for audio and menus), you can burn it to a DVD-5 using the "Best" option. If it's longer, burn it to a DVD-9.
Loved the article, share!