

 DVD Burner
Best App to Burn PowerPoint to DVD


As someone who isn't very tech-savvy, I thought converting a PowerPoint to a DVD would be complicated. But Cisdem DVD Burner was surprisingly easy to use. Thanks to it, our love story was perfectly presented at our wedding. - Pamela | Bride-to-be
Pamela and her fiancé Steven are childhood sweethearts and now they're getting married. Pamela strung together photos of their love story into a PowerPoint to show to family and friends at the wedding.
The challenge
Pamela was told there‘s no way to connect her laptop to the wedding venue’s setup, only a basic DVD player that connects to a TV or projector. She was almost freaking out. To play PowerPoint, Pamela had to burn it to a DVD. Since the wedding was almost here and she didn’t have time to learn complex video or DVD stuff, she just wanted simple, one-click way to get it done quickly.
The solution
Pamela discovered Cisdem DVD Burner on the App Store. The app has good reviews and decent ratings. She noticed many users saying it's beginner-friendly. Pamela purchased it after a quick trial.
DVD burning programs don’ support .pptx or .ppt files. However, Cisdem support said that she can directly export PowerPoint presentations as MP4 files.
Pamela expressed her gratitude to Cisdem and offered to share her experience with Cisdem users. Below are her steps.
Steps Pamela took to burn PowerPoint to DVD for the wedding
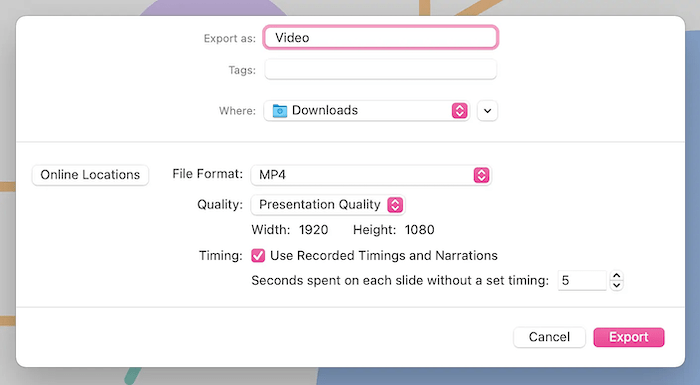
Step 1. Export MS PowerPoint to video
PowerPoint should be version 2010 or higher. I used the Mac version:
- Open PowerPoint, click the top menu bar, and select "File" > "Export."
- In the "File Format" option, choose MP4 or MOV.
- If your presentation has timings or narrations, check the “Timing” option.
- Then, export.
![export powerpoint to video]()
Step 2. Add the exported video to Cisdem DVD Burner
Download Cisdem DVD Burner from the Cisdem official website or app store. I obtained it from the Mac App Store.
Launch the software. Simply drag and drop your PowerPoint video into the software.
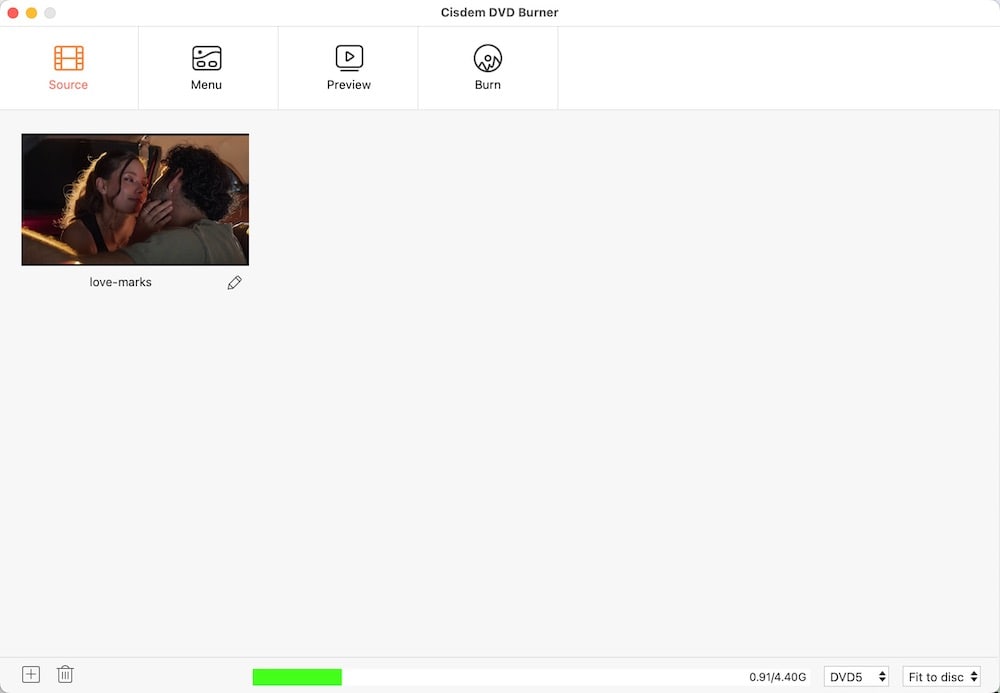
Step 3. Set DVD parameters
At the bottom of the "Source" window, you can select the TV standard, DVD type, and quality level.
I chose the NTSC television standard because our wedding reception is in California, USA. The slideshow is about nine minutes long, so I kept the default "Fit to Disc" option.

Note from Cisdem:
Slideshow videos are generally shorter and can fit on a DVD-5 disc. Whether you choose "Fit to Disc" or "Best", both options will maximize disc space and maintain top video quality. No compression required.
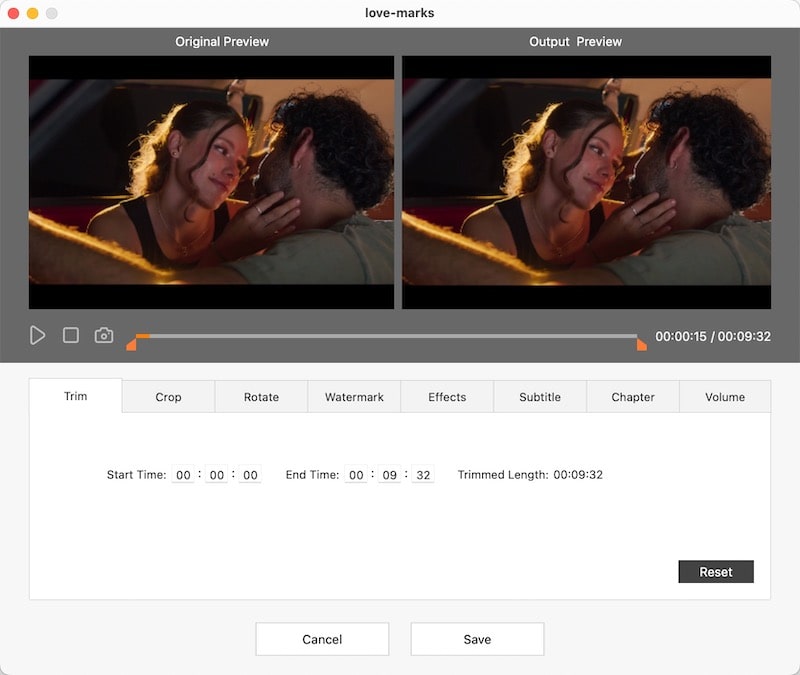
Step 4. Use editing tools
If you want to edit a video, click on the pencil icon below it. Of these 8 tools, I only used the following 2:
Trim: My exported PowerPoint video has a few seconds of blank space at the beginning and end. I needed to trim or cut those parts.
Volume: The volume at the wedding was too low in the exported PowerPoint video, so I increased it.
I didn't add chapters because:
- I already had “chapters” in the slideshow with titles and music.
- The wedding DVD is set to play automatically without requiring further interaction.
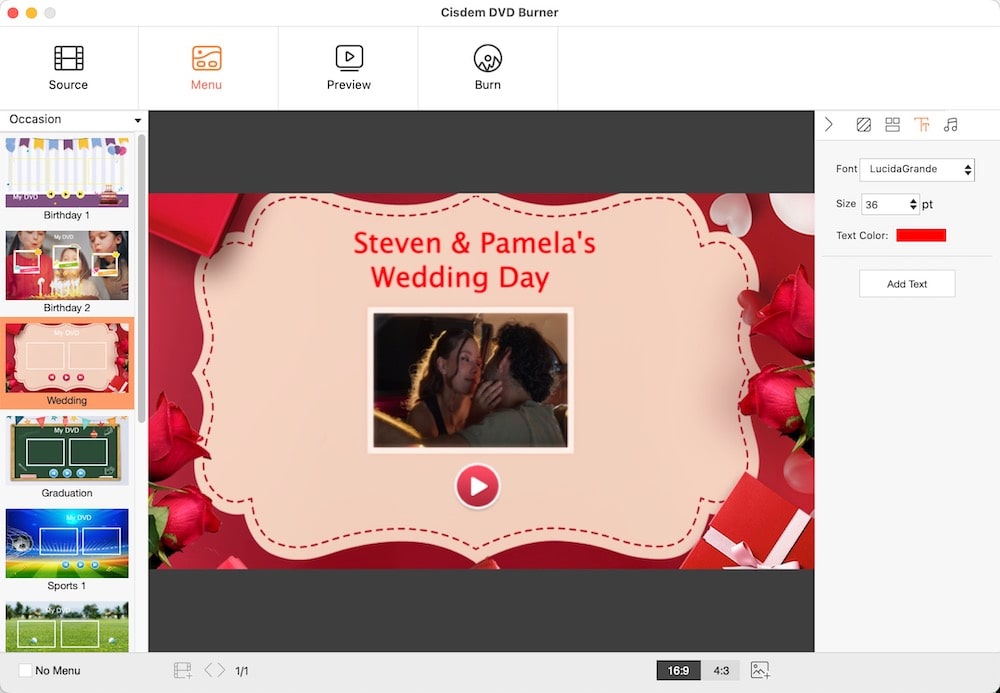
Step 5. Edit the menu
Click the “Menu” tab at the top of the interface. Select a template on the right and customize it.
- I selected the wedding-themed template from the Occasion collection. I think a Valentine’s theme could work too. If you have a better background image, just upload it from your computer or laptop.
- I renamed the DVD title to “Steven & Pamela's Wedding Day”.
- I chose a romantic song as background music.
Since my DVD only has one video, I didn't add any more frame labels.
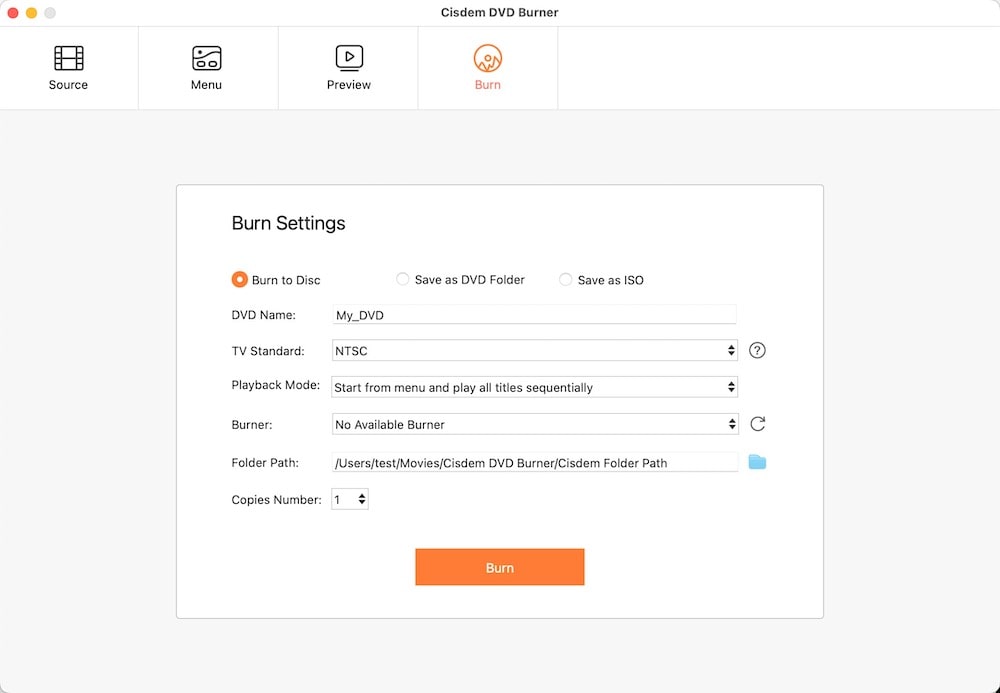
Step 6. Burn PowerPoint video to DVD
Preview and burn the DVD in the respective tabs.
- Preview: It mimics the interface and navigation experience of a DVD player. Just click buttons like “Menu” or “Title” with your mouse to make sure it all works.
- I selected the "Burn to Disc" option.
- I selected the “Start from menu and loop all titles” playback mode because I need the video to play in a loop.
- I inserted a new DVD-R disc into the external DVD drive and clicked "Burn".
Note from Cisdem:
- Use DVD-R discs from reputable brands like Verbatim and Sony. They are broadly supported by most standard DVD players, so you won’t have to worry about compatibility issues.
- Cisdem DVD Burner converts the video to MPEG-2 format for DVDs, then proceeds to burn it. The whole process requires significant system resources. To ensure a successful burn, please avoid using your computer for other activities during this process.
- You can save your edits as a project file to burn the same copy later.
FAQ
Yes. No matter which program you built your slides in, the key is getting it into a standard video format. If the program doesn’t have a video export option, you can record your video and then burn it with Cisdem DVD Burner.
That's normal. DVD resolution is 720x480 (NTSC) or 720x576 (PAL), significantly lower than the more common 1080p. Video undergoes compression during processing. Make sure to choose good quality when exporting your slideshow, so you get the best source file for DVD burning.
Video DVDs are not editable unless you burn a data DVD. If you're concerned about errors, you might consider:1. Use a DVD-RW disc. You can erase it and start over if something goes wrong.2.Save in Cisdem DVD Burner as a .cdbproject file for later use.
Loved the article, share!